iTerm2
Replacement for macOS Terminal
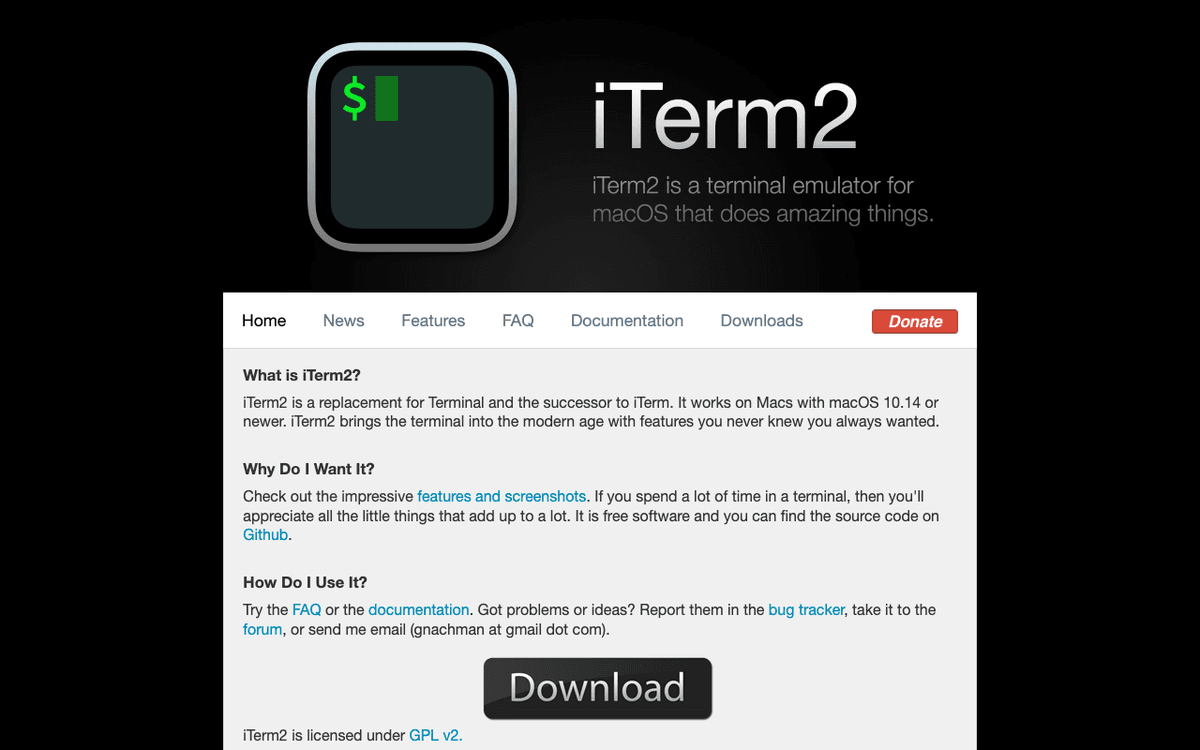
iTerm2 — Official Website
Quick Take: iTerm2
iTerm2 remains the undisputed king of macOS terminal emulators in 2026 for power users who demand control. While it faces stiff competition from AI-native tools like Warp and speed-focused engines like Alacritty, iTerm2 strikes the perfect balance between feature richness, stability, and performance. Its Metal rendering engine ensures it keeps up with modern hardware, while its scripting API and deep configuration options make it adaptable to any workflow. It is an essential install for every developer on a Mac.
Best For
- •Software engineers, DevOps professionals, and system administrators who need a highly customizable, reliable, and feature-dense terminal environment.
What is iTerm2? — Complete Guide for Mac Users in 2026
iTerm2 is widely regarded as the definitive replacement for Apple's native Terminal application, serving as the command-line interface (CLI) backbone for millions of developers, system administrators, and data scientists on macOS. Maintained primarily by George Nachman for over a decade, iTerm2 has evolved from a simple fork of the original iTerm into a powerhouse of productivity, offering deep customization, solid performance, and features that fundamentally change how users interact with the shell. In 2026, as AI-driven terminals like Warp continue to compete, iTerm2 retains its crown as the most configurable, scriptable, and reliable terminal emulator for the Apple ecosystem. It is fully optimized for Apple Silicon (M1 through M4 chips) and integrates smoothly with macOS Sequoia, leveraging the Metal rendering engine to ensure 120Hz performance on ProMotion displays without taxing the CPU. Unlike the basic Terminal.app, which offers bare-bones functionality, iTerm2 provides a suite of power-user tools: split panes, global search, autocomplete, and a unique Python scripting API that allows for complex automation. It bridges the gap between a text-based interface and a modern GUI application, supporting mouse interactions, images within the terminal, and clickable links. For developers working in complex environments—managing Docker containers, remote servers via SSH, or local build processes—iTerm2 acts as a mission control center. Its open-source nature (GPL v2) ensures it remains free and transparent, while its extensive documentation and plugin ecosystem (including deep integration with Oh My Zsh and Fish) make it an indispensable tool for anyone who spends significant time in the command line. Whether you are debugging code, monitoring system logs, or managing cloud infrastructure, iTerm2 offers the stability and feature density required for professional workflows.
Install with Homebrew
brew install --cask iterm2Deep Dive: iTerm2 Architecture and Internals
iTerm2 is not merely a UI wrapper around a Unix shell; it is a sophisticated emulation engine that bridges the gap between the chaotic stream of bytes from a TTY and the structured graphical environment of macOS. At its core, iTerm2 manages a grid of characters in memory, handling complex ANSI escape codes that dictate color, cursor movement, and text attributes. Its architecture is distinct because it decouples the 'model' (the terminal state) from the 'view' (the rendering). This decoupling allows for features like Instant Replay, where the model's history is snapshotted, independent of the current view.
Key Features
Split Panes and Broadcasting
One of iTerm2's most transformative features is its ability to divide a single window into an arbitrary number of vertically or horizontally split panes. Unlike standard tabs, split panes allow developers to view multiple processes simultaneously—such as a server log, a text editor, and a database shell—without context switching. Technically, each pane acts as a distinct pseudo-terminal (PTY) session but shares the parent window's resources. A critical sub-feature here is 'Input Broadcasting.' Users can toggle a setting to send keystrokes to all visible panes simultaneously. This is invaluable for DevOps engineers who need to run the exact same `apt-get update` or configuration command across multiple remote servers at once, ensuring consistency and saving significant time compared to serial execution.
Instant Replay
Instant Replay effectively introduces 'TiVo' or 'DVR' functionality to your terminal session. By pressing a hotkey (usually Cmd+Opt+B), iTerm2 invokes a timeline overlay that allows users to step back in time through their recent session history. Unlike a standard scrollback buffer, which is static, Instant Replay preserves the exact state of the terminal screen at specific moments, including overwrites and ncurses-based UI updates (like those in `top` or `vim`). Technically, this is achieved by maintaining a rolling buffer of screen states in memory. It matters immensely when a compilation error flashes on the screen and is immediately cleared by a build script reset; users can rewind, pause, copy the error log, and then return to the live session.
Shell Integration & Status Bar
iTerm2's Shell Integration is a suite of scripts that creates a bidirectional communication channel between the terminal emulator and the shell (zsh, bash, or fish). This allows iTerm2 to understand the semantic structure of your command line usage. It enables features like the 'Status Bar,' which can display CPU usage, battery level, current git branch, or memory stats directly in the terminal window. It also marks the prompt line, enabling users to jump between commands using keyboard shortcuts (Cmd+Shift+Up/Down) rather than scrolling blindly. Also, it tracks the exit status of commands, displaying a red or blue triangle to indicate failure or success, providing immediate visual feedback on long-running processes without needing to check `$?` manually.
Solid Search & Smart Selection
Searching in iTerm2 is vastly superior to standard terminal find functions. It supports solid Regular Expression (Regex) search, case-insensitivity, and highlighting of all matches on the screen. Complementing this is 'Smart Selection,' which uses sophisticated heuristics to detect text patterns like URLs, email addresses, file paths, and hash strings. When a user hovers over these recognized entities with the Command key held down, they become clickable hyperlinks. For example, clicking a file path can open that file in VS Code or IntelliJ, and clicking a URL opens the browser. This feature drastically reduces friction, turning static text output into an interactive dashboard where stack traces become direct links to the source code.
Python Scripting API
While many macOS apps support AppleScript, iTerm2 features a full-fledged Python API that allows for deep programmatic control over the application. This API is not just a wrapper; it connects to iTerm2's internal logic via a WebSocket interface, allowing scripts to create windows, split panes, inject text, query buffer contents, and modify profiles dynamically. This matters for automation enthusiasts and platform engineers who want to build custom workflows. For instance, a user can write a script that detects when they are in a specific directory and automatically splits the window, launches a specific set of microservices, changes the color scheme to indicate 'Production' environment, and arranges the layout exactly as needed for that project.
Metal Rendering Engine
To handle the high-throughput demands of modern development (such as catting large log files or running verbose build processes), iTerm2 uses a custom rendering engine built on Apple's Metal graphics API. In previous eras, terminal emulators relied on the CPU for drawing text, which caused significant lag and high energy consumption on high-resolution Retina displays. By offloading the drawing of glyphs, backgrounds, and cursors to the GPU, iTerm2 achieves a consistent 60FPS (or 120FPS on ProMotion Macs) with incredibly low latency. This results in a buttery-smooth scrolling experience and ensures that the terminal remains responsive even when receiving megabytes of data per second, preventing the UI freezes common in less optimized emulators.
Who Should Use iTerm2?
1The DevOps Engineer
A DevOps engineer manages a fleet of 10 web servers during a critical security patch rollout. Using iTerm2, they create a grid of 10 split panes, each SSH'd into a different server. Instead of manually typing the patch command ten times, they enable 'Broadcast Input.' As they type `sudo apt-get upgrade -y`, the command appears on all ten servers simultaneously. One server throws an error; the engineer immediately disables broadcasting, maximizes that specific pane with Cmd+Shift+Enter to investigate, uses 'Instant Replay' to see the exact error message that flashed by, fixes the dependency issue, restores the pane size, and re-enables broadcasting to finish the rollout. The visual feedback and parallel control turn a one-hour task into a five-minute operation.
2The Full-Stack Developer
A full-stack developer working on a complex React and Node.js application needs to monitor multiple data streams. They use iTerm2 to set up a dedicated workspace. The top pane runs the Webpack dev server for the frontend; the bottom-left pane runs the Node API backend; and the bottom-right pane is an active PostgreSQL shell. They use iTerm2's 'Triggers' feature to highlight the word 'ERROR' in bright red and 'WARNING' in yellow across all panes, ensuring they never miss a build failure. When a stack trace appears, they hold Command and click the file path, which instantly opens the specific line of code in VS Code. This integrated environment allows them to debug across the entire stack without ever leaving the keyboard.
3The Data Scientist
A data scientist works primarily with Python and Jupyter notebooks but prefers the speed of the CLI for data exploration. They use iTerm2's unique ability to render inline images using the `imgcat` script. When they run a script to generate a histogram using Matplotlib, instead of opening a separate window, the graph renders directly inside the terminal flow. They also use the iTerm2 Status Bar to monitor their M3 Max chip's memory usage while training a local LLM, ensuring they don't hit swap. By combining the Python API with shell integration, they have a script that automatically saves the terminal buffer to a text file after every model training run, creating an automatic log of experiments.
4The On-Call Site Reliability Engineer (SRE)
An SRE is woken up at 3 AM by an alert. They open iTerm2, which is configured with a 'Hotkey Window' that drops down from the top of the screen like a Quake console with a single keystroke. This profile is set with a distinct red background specifically for 'Production' access to prevent accidental commands. They use the 'Password Manager' built into iTerm2 to paste their SSH keys securely. While tailing logs, they use the search function with regex to filter specifically for HTTP 500 errors. The 'Mouseless Copy' feature allows them to grab the request ID of a failed transaction using only keyboard shortcuts and paste it into their incident ticket, resolving the immediate triage efficiently before closing the visor window.
How to Install iTerm2 on Mac
Complete installation guide for iTerm2 on macOS (Sequoia/macOS 12.4+) in 2026. The recommended method is via Homebrew for easy updates.
Install via Homebrew (Recommended)
The most efficient way to install and maintain iTerm2 is through Homebrew. Open your current Terminal.app and run: brew install --cask iterm2. This installs the application into your /Applications folder and links binaries automatically.
Manual Installation
If you do not use Homebrew, visit the official website (iterm2.com). Download the latest stable zip file. Unzip the archive, and manually drag the 'iTerm' icon into your 'Applications' folder to ensure it indexes correctly in Spotlight.
Grant Full Disk Access
For iTerm2 to function correctly with all shell commands (like listing contents of protected system directories), go to System Settings > Privacy & Security > Full Disk Access. Click the '+' button and add iTerm2 from your Applications folder.
Install Shell Integration
Once iTerm2 is open, go to the menu bar: iTerm2 > Install Shell Integration. This will run a script (curl | bash) that adds necessary hooks to your .zshrc or .bash_profile, enabling features like the status bar, download support, and prompt marking.
Pro Tips
- • Enable 'Natural Text Editing' in Preferences > Profiles > Keys > Presets to make standard Mac shortcuts (Cmd+Left/Right) work for word jumping.
- • Set iTerm2 as your default terminal via Preferences > General > 'Make iTerm2 Default Term'.
- • Install a Nerd Font (like MesloLGS NF) immediately to support Powerline glyphs and icons in your prompt.
- • Disable the native macOS 'secure keyboard entry' if you notice global hotkeys in other apps failing while iTerm2 is focused.
Configuration Tips
Optimize for Performance with GPU Rendering
Navigate to Preferences > General > Magic and ensure 'GPU Rendering' is enabled. This forces iTerm2 to use the Metal engine. On Apple Silicon Macs, this significantly lowers CPU usage during heavy text output. If you experience text artifacts, you can toggle 'Draw customized powerline glyphs' in the Advanced settings to refine rendering.
Configure the Quake-Style Hotkey Window
Go to Preferences > Keys > Hotkey. Create a dedicated system-wide hotkey (e.g., Ctrl+Space) that toggles a floating terminal window. Set this profile to 'Floating Window' and 'Top of Screen'. This provides instant access to the command line from any desktop space or full-screen app without needing to Cmd+Tab.
Silence the Bell and Visual Alerts
The default terminal bell is annoying. Go to Preferences > Profiles > Terminal and uncheck 'Silence bell'. More importantly, check 'Flash visual bell' instead. This provides a subtle visual cue when an error occurs or a tab completion fails, keeping your workflow quiet but informative, especially in open offices.
Unlimited Scrollback Buffer
By default, terminal history is truncated. For developers debugging crashes, this is fatal. Go to Preferences > Profiles > Terminal and check 'Unlimited scrollback'. Be aware this consumes RAM, but on modern Macs with 16GB+ memory, the trade-off is negligible compared to the value of retaining all logs.
Alternatives to iTerm2
While iTerm2 is the gold standard, the Mac terminal space has seen innovation from AI-native and GPU-accelerated competitors.
Warp
Warp is the strongest modern competitor to iTerm2 in 2026. It is built with Rust and features a block-based interface rather than a character stream, treating commands and outputs as distinct units. Its primary differentiator is built-in AI (Warp AI) that helps generate commands and debug errors using LLMs. While Warp is more user-friendly for beginners and has better out-of-the-box collaboration tools, iTerm2 remains superior for privacy-conscious users (no login required), advanced scripting, and raw customizability of the emulation layer.
Alacritty
Alacritty is strictly focused on one thing: speed. It is a GPU-accelerated terminal emulator written in Rust that claims to be the fastest in existence. Unlike iTerm2, Alacritty has no GUI configuration—everything is handled via a YAML/TOML config file. It lacks tabs, splits (relying on tmux for that), and convenience features like search or image rendering. It uses significantly fewer resources than iTerm2, making it the preferred choice for minimalists and users on older hardware who value raw throughput over features.
Apple Terminal
The default Terminal.app is pre-installed on every Mac. Its main advantage is that it requires no installation and is highly energy-efficient. However, it lacks almost all power features: no split panes, no instant replay, no shell integration, and limited color support (True Color support is spotty compared to iTerm2). For a casual user running a ping command once a month, it is sufficient. For any professional development work, iTerm2 is a necessary upgrade.
Pricing
iTerm2 is completely free to download and use. It is open-source software licensed under GPLv2. There are no paid tiers, subscriptions, or locked features. The project is sustained by donations to the developer, George Nachman, via Patreon and GitHub Sponsors. This 'forever free' model contrasts sharply with venture-backed competitors like Warp.
Pros
- ✓Native Apple Silicon support with Metal renderer ensures high performance on 4K/5K displays.
- ✓Extremely deep configuration options allow users to customize every aspect of keyboard handling and UI.
- ✓Unique 'Instant Replay' feature saves developers from losing context when screens clear.
- ✓Solid Python API enables complex automation beyond standard AppleScript capabilities.
- ✓Shell Integration features provide semantic understanding of command history and directory navigation.
- ✓Completely free and open-source with no mandatory cloud login or data telemetry.
Cons
- ✗High memory footprint compared to lightweight alternatives like Alacritty or Terminal.app.
- ✗The settings menu is overwhelming and complex for new users.
- ✗Startup time can be slower than Rust-based terminals if many plugins are loaded.
- ✗Lacks native AI command generation features found in newer tools like Warp.
Community & Ecosystem
iTerm2 benefits from one of the oldest and most active communities in the macOS ecosystem. The project is hosted on GitHub with thousands of stars and a very responsive issue tracker maintained by George Nachman. Because it is the de-facto standard, almost every shell theme (Powerlevel10k, Starship) and CLI tool is tested primarily against iTerm2. There is a vast library of color schemes (iTerm2 Color Schemes repo) and third-party scripts available. Documentation is comprehensive, though technical. Support is community-driven via GitHub issues, Stack Overflow, and Reddit r/commandline.
Video Tutorials
Getting Started with iTerm2
More Tutorials
How To Make Your Boring Mac Terminal So Much Better
Josean Martinez • 1.0M views
iTerm #twitch #terminal #mac
Robotic Nation • 37.7K views
iTerm vs. macOS Terminals - My Personal Choice it Terminal Emulators.
You Suck at Programming • 35.6K views
Frequently Asked Questions about iTerm2
About the Author

Related Technologies & Concepts
Related Topics
Mac Development Environment Setup
iTerm2 is the foundational layer of a Mac dev setup. This cluster explores tools that are typically installed alongside it.
Terminal Customization
Deep dive into customizing the look and feel of the command line, where iTerm2 acts as the host application.
Remote Server Management
Tools for DevOps and SREs. iTerm2's broadcasting and SSH features link it to this cluster.
Sources & References
Key Verified Facts
- iTerm2 uses a custom Metal rendering engine to achieve 60+ FPS performance.[cite-1]
- iTerm2 supports a unique tmux integration mode (
-CC) that allows tmux windows to behave like native windows.[cite-2] - The software is licensed under GPL v2 and is open source.[cite-3]
- iTerm2 includes a Python API that connects via WebSocket for scripting.[cite-4]
- Input broadcasting allows keystrokes to be sent to multiple panes simultaneously.[cite-5]
- 1Homebrew
Accessed May 6, 2026
- 2Bundl
Accessed May 6, 2026
- 3iTerm2 Features - Metal Rendering
Accessed May 6, 2026
- 4iTerm2 Documentation - tmux Integration
Accessed May 6, 2026
- 5iTerm2 License - GPL v2
Accessed May 6, 2026
- 6iTerm2 Python API Documentation
Accessed May 6, 2026
- 7iTerm2 Features - Input Broadcasting
Accessed May 6, 2026