OnyX
System maintenance and optimization utility
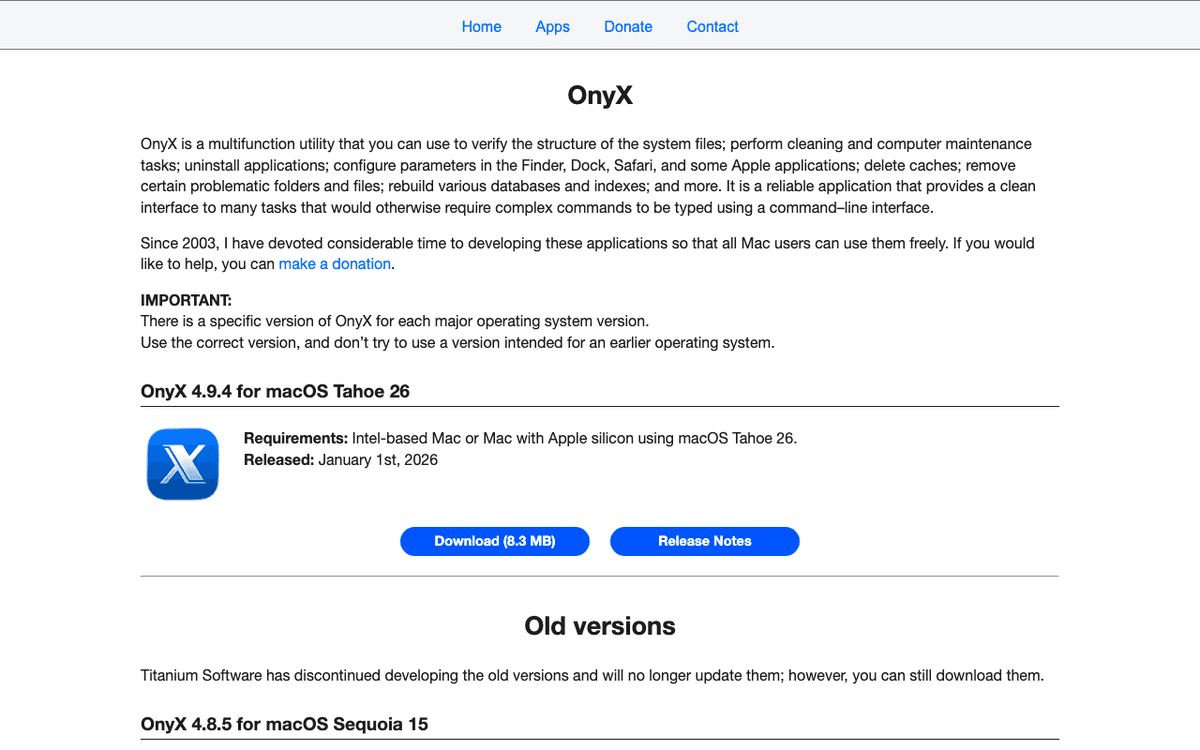
OnyX — Official Website
Quick Take: OnyX
OnyX, in 2026, continues its legacy as an indispensable and exceptional free utility for macOS maintenance and optimization. Its solid feature set, spanning deep cleaning, system verification, hidden parameter customization, and thorough uninstallation, makes it an unparalleled tool for those who desire granular control over their Mac. While its functional, less graphical interface and the requirement for user understanding might deter novices, for power users and Mac enthusiasts, OnyX is a powerful bridge to complex UNIX commands, wrapped in an accessible application. The dedication of Joël Barrière to constantly update OnyX for each new macOS version ensures its relevance and reliability, making it a staple in any serious Mac user's software arsenal. It’s a testament to effective donationware, offering premium-level functionality without the price tag, provided you're willing to learn its depths.
Best For
- •Mac Power Users and Enthusiasts
- •Users Seeking Deep System Customization
- •Individuals Prioritizing Free Maintenance Tools
- •IT Support and System Administrators
What is OnyX?
OnyX is a venerable and highly regarded multifunction utility for macOS, meticulously developed by Joël Barrière under Titanium Software. Launched in 2003, shortly after the release of OS X Jaguar, it has consistently served as a powerful, free tool for Mac users seeking deeper control over their operating system. In 2026, with macOS 'Tahoe' 26 being the latest iteration, OnyX remains a critical application for maintaining optimal system health and performance. Its core value proposition lies in providing a clean, accessible interface to numerous system tasks and hidden parameters that would otherwise require complex command-line entries in Terminal. For Mac users navigating the complexities of modern macOS, OnyX offers essential functionalities such as verifying startup disk integrity, performing comprehensive cleaning (caches, logs, temporary files), rebuilding system databases (like Spotlight indexes), uninstalling applications thoroughly, and customizing various hidden settings in Finder, Dock, Safari, and other Apple applications. It stands out in the crowded System Utilities landscape by being completely free and focusing on solid functionality over flashy visuals, catering to users who prioritize deep system control and reliability.
Install with Homebrew
brew install --cask onyxKey Features
System Maintenance & Verification
This feature allows users to verify the structure of the startup disk and system files, ensuring their integrity. It also includes options to rebuild various system databases and indexes, such as the Spotlight index, which can resolve indexing issues and improve search performance. Regular use helps detect potential problems early, maintaining system stability.
Deep Cleaning Operations
OnyX provides extensive cleaning capabilities, targeting system, user, application, and font caches, as well as various log files and temporary items that accumulate over time. This helps reclaim valuable disk space and can significantly improve system responsiveness and overall performance by removing unnecessary clutter. Users can choose specific items to clear for granular control.
Parameter Customization
One of OnyX's most powerful features is its ability to access and modify hidden parameters within macOS and various Apple applications like Finder, Dock, and Safari. This allows users to tweak behaviors and appearances not exposed in standard System Settings, offering a high degree of personalization, from adjusting animation speeds to changing screenshot formats.
Application Uninstallation
Beyond simply dragging an app to the Trash, OnyX offers a more thorough uninstallation process. It helps identify and remove associated files, preferences, and support data that applications leave behind, ensuring a cleaner system and preventing residual files from consuming disk space or causing conflicts.
Utilities Access
This section consolidates access to several useful, yet often hidden, macOS utilities and functions. Users can easily access tools like Storage Management, Screen Sharing, and Wireless Diagnostics directly from OnyX. It also provides access to UNIX manual pages and allows for changing the visibility status of files, folders, and disks, enableing advanced file management.
Secure File Deletion
For enhanced privacy and data security, OnyX includes features to securely delete files. Rather than just removing pointers to data, this function overwrites the disk space occupied by deleted files multiple times, making them irrecoverable even with specialized data recovery software. This is crucial for sensitive information.
Who Should Use OnyX?
1The Everyday Mac User
A marketing professional, after months of creating large project files, installing various applications for different campaigns, and numerous browser tabs, notices their MacBook Air (M3, macOS Tahoe 26) is starting to feel sluggish and storage is tight. They launch OnyX, navigate to the 'Cleaning' tab, and with a few clicks, clear out system and application caches, outdated logs, and internet browsing data. They also run the 'Maintenance' scripts to rebuild the Spotlight index, significantly speeding up their search for client assets and regaining several gigabytes of disk space, bringing their Mac back to snappy performance.
2The macOS Power User / Developer
A software developer working on a complex Xcode project finds themselves frequently adjusting system-level behaviors. Instead of typing lengthy commands into Terminal, they use OnyX's 'Parameters' pane to quickly toggle hidden settings. For example, they might disable window animations for a snappier workflow, change the default screenshot file format and location to better integrate with their project's assets, or force quit stubborn background processes without resorting to Activity Monitor, streamlining their development environment for maximum efficiency on their Mac Studio (M4 Ultra, macOS Tahoe 26).
3The IT Administrator / Mac Support Specialist
An IT administrator is troubleshooting a fleet of iMacs (M2, macOS Sequoia 15) in a design studio. One machine is exhibiting unusual slowdowns and application crashes. The admin installs OnyX on the problematic Mac, runs the 'Verification' tools to check the startup disk and system file integrity. They then use the 'Utilities' section to examine system logs for error patterns and perform a deep clean. This systematic approach, leveraging OnyX's diagnostic and cleaning capabilities, allows them to quickly pinpoint a corrupted cache file as the culprit, resolving the issue without a full system reinstall.
How to Install OnyX on Mac
Installing OnyX on your Mac in 2026 is a straightforward process, though it's crucial to download the version specifically designed for your macOS. Titanium Software meticulously develops a distinct OnyX version for each major macOS release to ensure full compatibility and functionality.
Download the Correct Version
Visit the official Titanium Software website (titanium-software.fr) and locate the download section for OnyX. Crucially, identify and download the specific version of OnyX that matches your current macOS (e.g., OnyX 4.9.9 for macOS 'Tahoe' 26, OnyX 4.8.5 for macOS 'Sequoia' 15). Downloading an incompatible version will prevent the application from working correctly.
Install the Application
Once the .dmg file is downloaded, double-click it to open the disk image. Drag the OnyX application icon to your 'Applications' folder. This places the application in the standard location for macOS applications. If prompted, confirm that you wish to open an application downloaded from the internet.
Grant Full Disk Access & Administrator Privileges
Upon its first launch, OnyX will likely request administrator credentials. Enter your username and password. More importantly, it requires 'Full Disk Access' to perform its deep system operations. Navigate to System Settings > Security & Privacy > Privacy & Security, then select 'Full Disk Access'. Unlock the padlock, click the '+' button, and add OnyX to the list, ensuring its checkbox is ticked. This is a critical step for OnyX to function correctly.
Optional: Install via Homebrew Cask
For users comfortable with the command line, OnyX can also be installed using Homebrew Cask. If you have Homebrew installed, simply open Terminal and execute the command: brew install --cask onyx. Homebrew will handle the download and placement in your Applications folder, though you will still need to manually grant Full Disk Access for the application.
Pro Tips
- • Always ensure you download the version of OnyX specifically designed for your current macOS to prevent compatibility issues.
- • Before running any major maintenance or cleaning tasks, it is highly recommended to back up your Mac using Time Machine or another backup solution.
- • Granting Full Disk Access is essential; without it, OnyX's deeper system maintenance and cleaning functions will be severely limited.
Configuration Tips
Always Backup Before Major Changes
Before initiating any significant cleaning, maintenance, or parameter modifications within OnyX, it is critically important to perform a full system backup. While OnyX is reliable, manipulating deep system files carries inherent risks. Using Time Machine or a third-party backup solution ensures you can revert to a stable state if an unexpected issue arises, providing peace of mind during system optimization.
Understand Each Option Before Execution
OnyX provides a vast array of options, many of which interact with fundamental macOS components. Avoid blindly checking boxes or running tasks without understanding their function. Take the time to read the descriptions provided within the application or consult online resources. Knowledge of what each setting or cleaning task accomplishes will prevent unintended system behaviors or the removal of essential files.
Grant Full Disk Access Promptly
For OnyX to perform its full range of maintenance and cleaning tasks effectively, it requires 'Full Disk Access' in macOS System Settings. Do not skip or delay this step. Without proper permissions, many of OnyX's core functions, such as deleting system caches or rebuilding critical databases, will be restricted, severely limiting its utility and impact on system performance.
Alternatives to OnyX
While OnyX offers a powerful and free solution, several other utilities provide similar or complementary functionalities, often with different approaches to user experience and pricing.
CleanMyMac X
CleanMyMac X is a popular premium alternative that offers a more user-friendly, visually appealing interface with a strong focus on automation and ease of use. It provides extensive cleaning, optimization, malware removal, and privacy protection features, often with clear visual indicators of space reclaimed. Unlike OnyX, it's a paid subscription service but appeals to users who prefer an 'all-in-one' solution with minimal technical fuss.
Cocktail
Developed by Maintain, Cocktail is very similar to OnyX in its functionality, offering a broad range of system maintenance, cleaning, and customization options for macOS. It also provides a clean interface to many UNIX functions and hidden settings. However, unlike OnyX's donationware model, Cocktail is a commercial application requiring a paid license (e.g., $19.99/year for a 2023 version, likely adjusted for 2026), making OnyX a more attractive option for budget-conscious users.
iBoysoft DiskGeeker
iBoysoft DiskGeeker is a comprehensive disk management tool that serves as a solid alternative. It excels in decluttering and improving system performance, similar to OnyX, but often with simpler steps and a more modern interface. Beyond cleaning, it offers advanced features like disk error checking, disk encryption, and the ability to read/write to BitLocker and NTFS drives. While powerful, it is a paid software, catering to users who need a broader set of disk utility features in a more streamlined package.
Pricing
OnyX stands out in the macOS utility landscape as a completely free application. Developed and maintained by Joël Barrière, it is offered as 'donationware,' meaning users can download, use, and distribute it without any cost. There are no hidden fees, subscription tiers, or premium features locked behind a paywall. The developer solely relies on voluntary donations from satisfied users to support its ongoing development and updates for each new macOS version. This model makes OnyX an incredibly accessible and valuable tool for all Mac users, from casual to power users, without financial barriers.
Pros
- ✓Completely free to use, without any hidden costs, subscriptions, or feature limitations.
- ✓Offers an exceptionally full set of maintenance, cleaning, and optimization tools.
- ✓Provides access to numerous hidden macOS parameters and UNIX utilities not available through standard System Settings.
- ✓A dedicated version is released for each major macOS, ensuring full compatibility and optimized performance.
- ✓Regularly updated and actively maintained by its developer, Joël Barrière (Titanium Software).
- ✓Features a clean, functional, and logical interface that organizes complex tasks effectively.
- ✓Capable of significantly improving Mac performance, stability, and reclaiming substantial disk space.
- ✓Guaranteed to be free of adware, spyware, or any other malicious background processes.
Cons
- ✗Not ideal for absolute beginners; some features require a basic understanding of macOS operations to avoid unintended consequences.
- ✗The sheer number of options and technical depth can be overwhelming or intimidating for novice users.
- ✗Lacks the polished, visually rich user interface and animated feedback often found in commercial alternatives.
- ✗Does not offer automated, scheduled maintenance tasks, requiring manual initiation for all operations.
- ✗Initial startup disk verification can cause a temporary system slowdown, which might be perceived as inconvenient.
Community & Support
OnyX is primarily a passion project of its sole developer, Joël Barrière of Titanium Software. Support mainly flows through the official Titanium Software website (titanium-software.fr), where users can find the latest versions, release notes, and contact information for the developer. While there isn't a dedicated official forum or extensive GitHub activity specific to the macOS utility, a strong community of loyal users discusses and shares tips on various Mac enthusiast forums and platforms. The documentation within the app is generally clear, and the developer is known for consistently updating OnyX for each new macOS release, reflecting a deep commitment to the product and its users.
Video Tutorials
Getting Started with OnyX
More Tutorials
How the OnyX App Works
Cyber-Seniors • 6.1K views
3 Mac Apps Apple Doesn’t Want You to Know!
Sillycorns • 583.7K views
Essential Mac Apps for 2026: Upgrade Your Workflow! #shorts
Renz Sadiwa • 1.3M views
Frequently Asked Questions about OnyX
About the Author

Productivity & Workflow Analyst
Related Technologies & Concepts
Sources & References
Fact-CheckedLast verified: May 6, 2026
- 1macupdate.com
Accessed May 6, 2026
- 2bestreviews.net
Accessed May 6, 2026
- 3macworld.com
Accessed May 6, 2026
- 4titanium-software.fr
Accessed May 6, 2026
- 5filehorse.com
Accessed May 6, 2026
- 6sourceforge.net
Accessed May 6, 2026
- 7spotify.com
Accessed May 6, 2026
- 8softonic.com
Accessed May 6, 2026
- 9titanium-software.fr
Accessed May 6, 2026
- 10macupdate.com
Accessed May 6, 2026
Research queries: OnyX macOS review 2026; OnyX for Mac features; OnyX Titanium Software; OnyX installation guide macOS; OnyX pricing model